


What to leave in, what to leave out
How to use your timeline and narrative arc to build an outline

You’re working on what you think might be a book. You’re prolific, writing a lot. But as you chug along, doubt threatens to derail you. “Should this scene go here? How do I decide what order my chapters should be in? What do I include? There’s so many stories I want to tell. But how do they fit together?”
Such questions can lead you to feel blocked or stuck. Structure questions keep writers from writing far too often. It doesn’t have to be this way!

Photo by Tima Miroshnichenko: https://www.pexels.com/
If you’ve ever had this conversation with yourself, you are not alone. Just this week, three of my coaching clients confessed to me that they’ve wrestled with these questions. I’ve grappled with these issues myself. But I’ve got some practical tips for you today to move forward, get unstuck, and build a workable outline for your book.
You’re a storyteller—whether you write fiction, nonfiction, memoir. You have a lot to say, a lot of wisdom to impart. But how do you put it together in a format that makes sense? How do you build a compelling outline and give your book a solid structure? Today we’re going to look at the first steps toward an outline. Consider this Outlining Part One. Next week, part two!
Ultimately, you goal is not just to write, but to write a book that keeps the reader engaged. If your reader is not turning pages in eager anticipation, if they are not seeing in your story a reflection of their own story or what they wish could be their story, they are likely to give up. As a writer, that’s the last thing you want to happen.
So you’ve got to pay attention to structure. In fiction, we call it the plot, and there are whole books written and seminars given on how to plot your novel. Essentially, the protagonist of your novel, or your memoir (you) goes on a journey, in which they want something, and must overcome obstacles to get it.
In nonfiction, the framework may vary. The framework of a journey is still there, but often, it is the reader who wants something and must overcome obstacles to get it. Your book guides them on that journey. (So yes, before you get to the outline, you need to know who your reader is and what they want.)
Both fiction and nonfiction books follow a narrative arc, which I explained in detail in this recent post.
I often coaching non-fiction writers who blend their story with their topical book. The books have an element of memoir, but also of self-help or prescriptive advice for the reader that helps them solve their problem. They blend stories from their own life with teaching on their topic. Often, their credibility flows from their own journey of transformation. They have faced obstacles and overcome them, and want to share those life lessons, whether they are writing about parenting teens, overcoming adversity, building perseverance, or how to set and meet goals.
Even if you’re not writing memoir, I always suggest starting with a timeline, as I wrote about in this recent post. In nonfiction, you will mine your timeline for anecdotes and stories that help illustrate your teaching points. They show the reader that you’ve been in their shoes—perhaps not that long ago. You can relate to their struggles, and can help them solve their problem because you’re just a few steps ahead of them on the journey.
Once you have a timeline, and a narrative arc, it becomes easy to craft the structure of your book.
I have recently fallen in love with working on 11 by 17 paper—a suggestion of author and designer Liz Bell Young. It’s big enough to dream on, to add things to.
To outline your book and begin to find the structure, start with either an 11 by 17 page, or a whiteboard that is at least that big.
Draw the classic narrative arc: exposition, inciting incident, rising action, crisis, climax, falling action, denouement (aka resolution). (see photo)
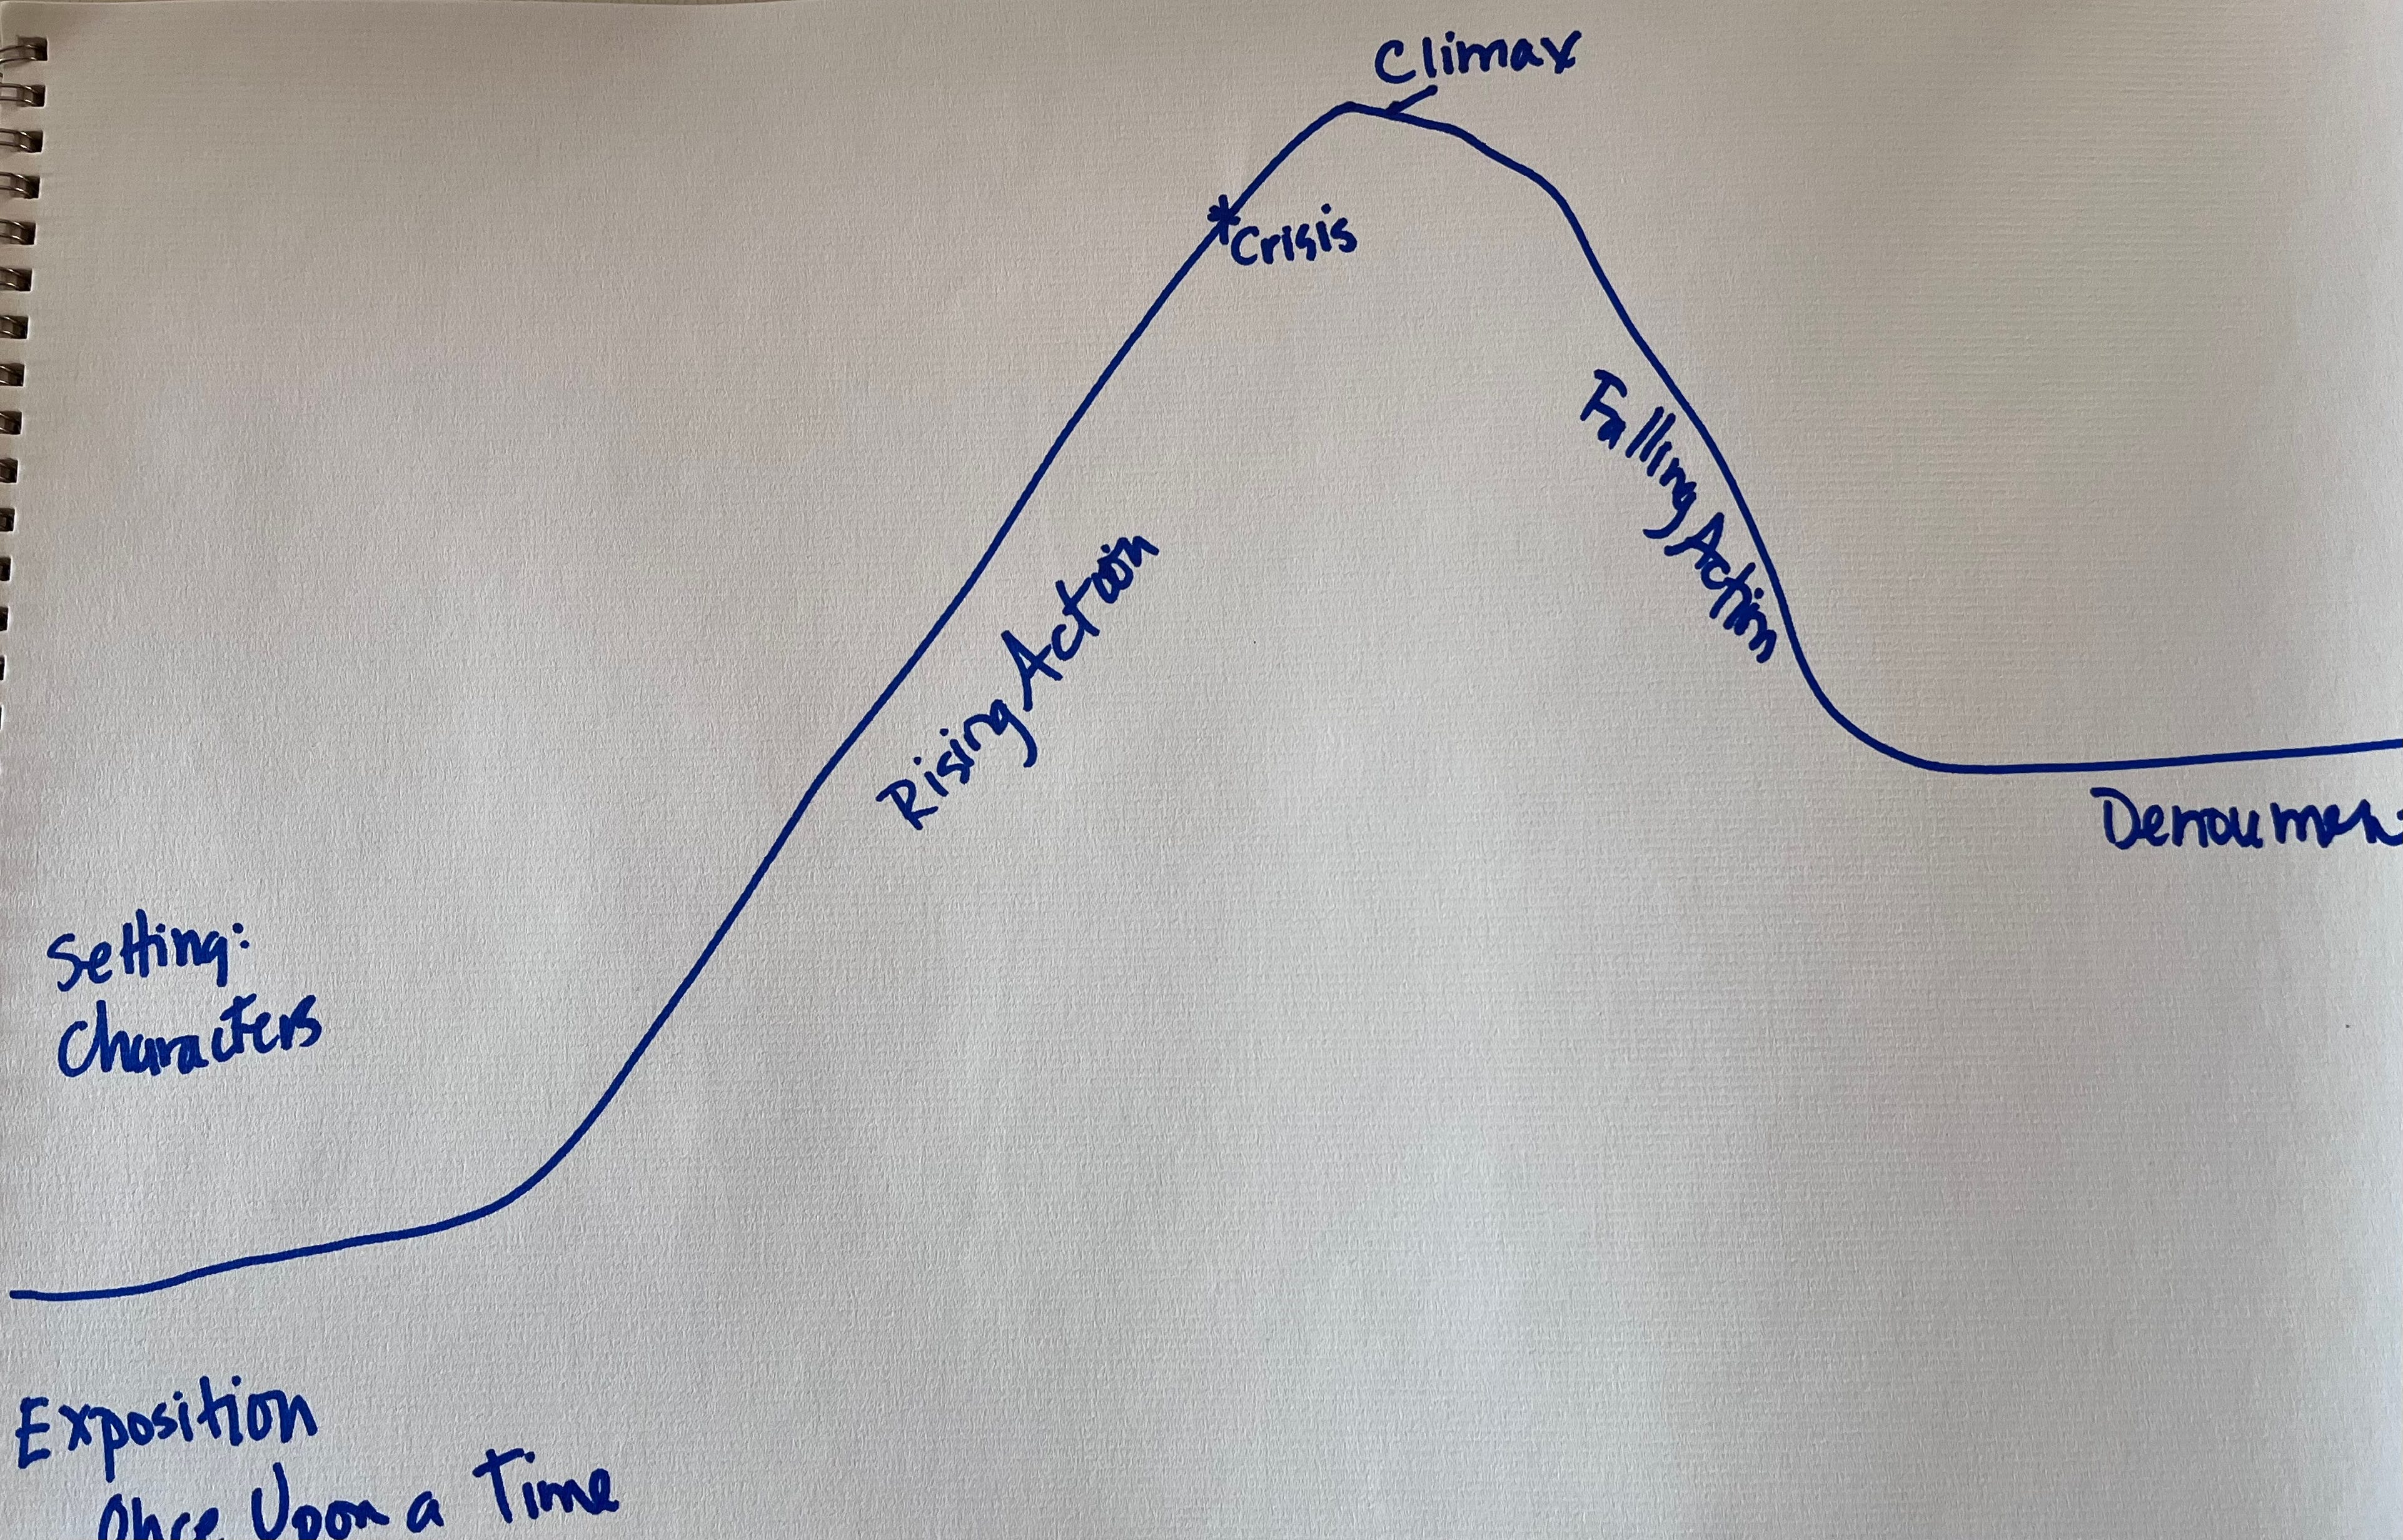
My very fancy hand drawn narrative arc.
Then, brainstorm the topics you want to cover, the strategies you want to share. Write each one on a sticky a separate sticky note. I love using colorful PostIt notes.
Second, go through your timeline and put each key incident a stick as well.
Now, put the timeline sticky notes onto the narrative arc. Some of them won’t fit. That might tell you that incident might not fit in this book. It might fit in a blog post, or a future book, or just in your journal.
Then, look at your topic stickies. Which ones fit with which stories or life lessons? Add them to the narrative arc.
You’ll likely rearrange the stickies (which is why we use them). What was that inciting incident? Was it when you nearly went bankrupt and decided to take control of your finances? Was it when your doctor told you if you didn’t lay off the fried food and start exercising you would die young? Was it the morning you woke up hungover, sick and tired of being sick and tired?
What obstacles did you face? Some might be worth mentioning, others may not. What life lessons did you learn from your experiences? Do these stories fit with your topic, or not?
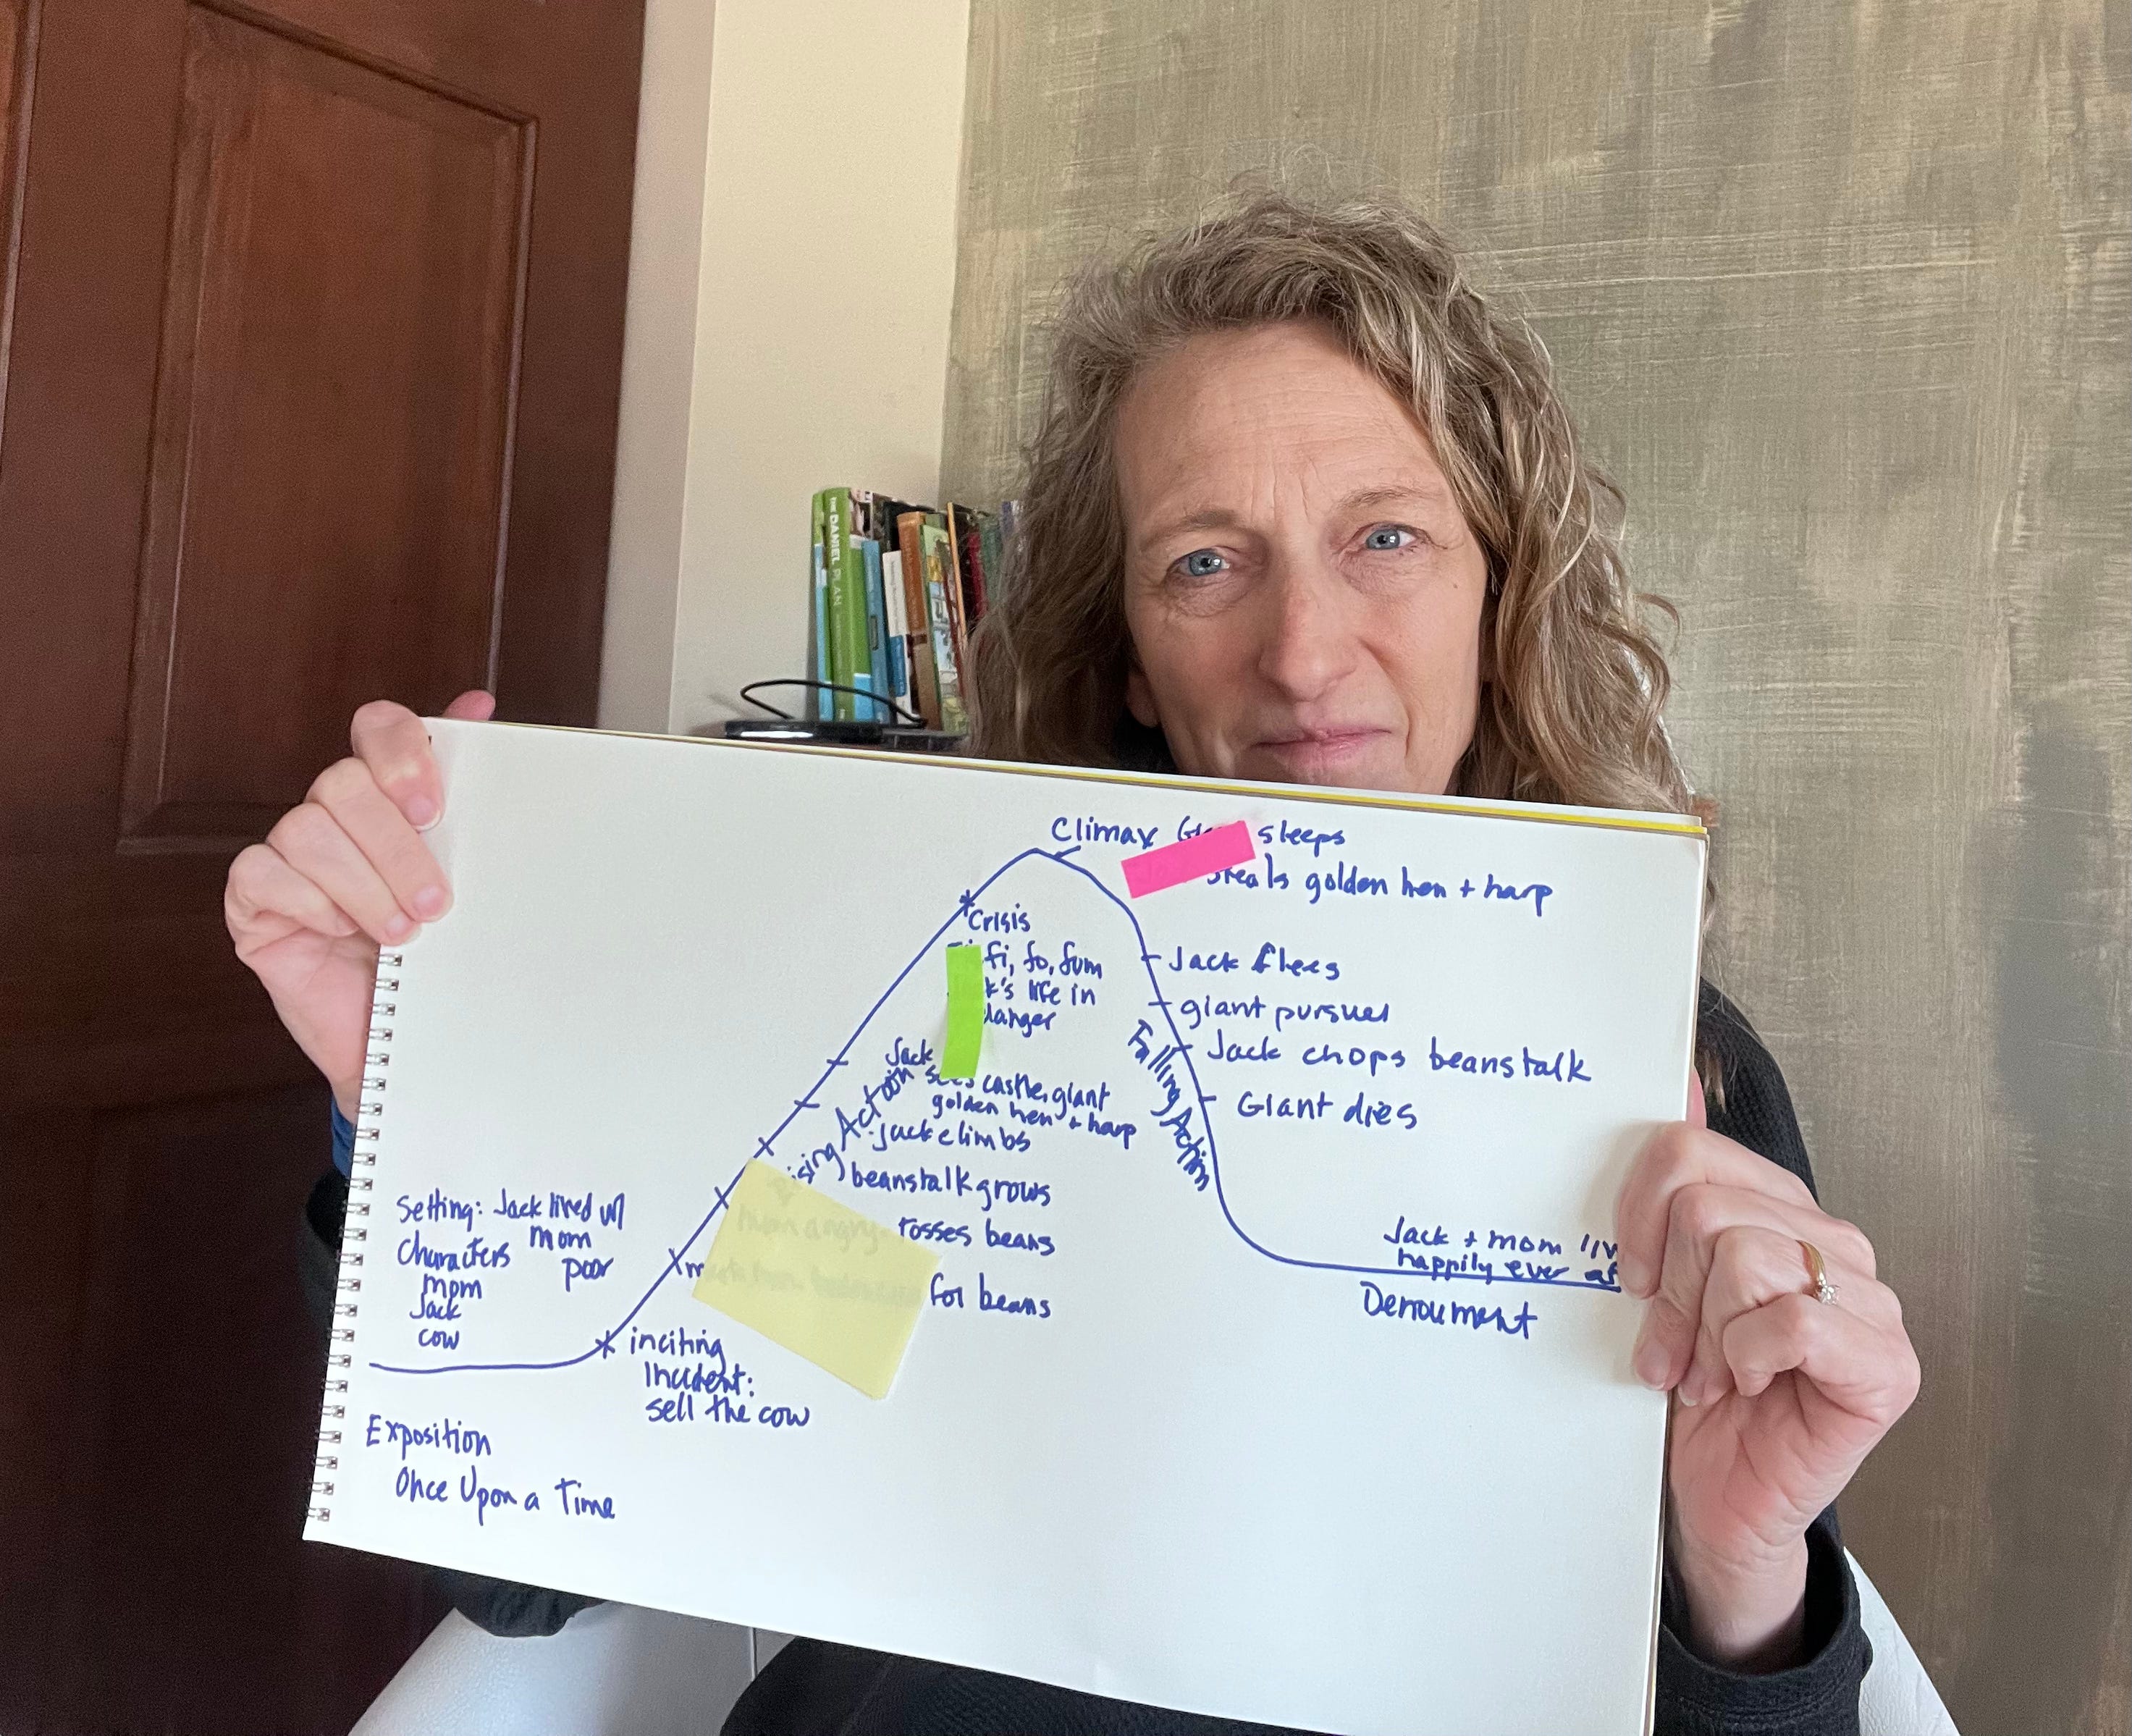
Once your narrative arc is covered with stickies that represent stories from your life, and ideas you want to share, you’ve got the foundation of an outline.
it’s simply a matter of dividing the content into chapters. Each of which must have a beginning, middle and end as well. We’ll dive deeper into that next week, so be sure to subscribe so you don’t miss a thing!
Meanwhile, if you have ideas you’d like to share about narrative arc, timelines and book structure, join the conversation in the comments!
P.S. Friends, I’m really trying to grow this newsletter! So many of you tell me it’s helping you on your writing and publishing adventure. Could I ask you to please share it with two other writers who you think might enjoy it? Just click the button below to share. Thank you!!